In its existing state, two pieces of white vinyl lattice were screwed directly into the exterior of the bottom of the addition and just left wild and free on all other sides. As a result, it started to sag and get all bendy and terrible looking. Since we don't have a shed or garage, we've been using the under-addition space as storage for things like bags of dirt and mulch and our garden tools.
 |
| Before left side lattice. |
 |
| Before right side lattice. We actually forgot to take "befores" so these aren't great photos. |
The unsightly lattice and tackiness of a bunch of junk has been haunting us for quite a while and we have been forming our plan of attack, but couldn't act on it because John needed a circular saw. During our last trip to Michigan, we were discussing our projects with my parents and lo and behold, my Dad just happened to have an extra circular saw (of course). Unfortunately, the TSA frowns on passengers travelling with power tools, so we had to wait until he could so kindly ship it to us. Without any further excuses, we were ready to replace our rotten lattice.
I should mention we took our inspiration for this project from the This Old House article "How to Install Porch Lattice", in case anyone wants a better written technical description. So, first we obviously ripped out the nasty piece on the right, but decided to keep the left one. As you can see in the photo above, our cable wire was run right through one of the holes and we decided it would be a pain to deal with that, so we'd just work around it and save us the cost of another lattice panel.
 |
| Thanks, Papa Harold! |
 |
| Nakey! |
Our first step was to make the frames that would hold the lattice securely in place. Once all the wood was cut to size, John attempted to use his new Kreg Jig to make pocket holes, but unfortunately, the wood was slightly damp and the sides pulled apart. We had to wait while the boards sat in the sun to dry out... and then spent the night inside to completely dry.
 |
| The sunbathing boards. |
After the boards were finally dry, John drilled in the pocket holes and screwed together all the frames, and then it was my turn to paint them all. We just went with straight-off-the-shelf white to blend in with the siding.
 |
| One pitiful looking frame. We were working at night after work, so please excuse the poor lighting. |
John then used the frames as a template to cut out the lattice panels, using his new-to-him circular saw. Look, we're putting our old fence chunks to good use as a work table... and sawing in the dark which probably isn't the safest thing to do...
Then came the arduous task of painting all the lattice panels. It was kind of a pain trying to get all the sides covered, especially while we were being eaten alive by mosquitoes. Luckily, we were really happy with the color we chose - Martha Stewart's "Sea Glass" color matched to our favorite Behr paint and primer.
Dexter seemed to like it, too, as he couldn't help but keep rubbing up against our sawhorses and ended up with a bit of Sea Glass in his fur.
Once the lattice was dry, John screwed the panels onto the frames. We then attached the right-side panel using some L-brackets. You can see the piece of wood here where the old lattice was directly screwed into.
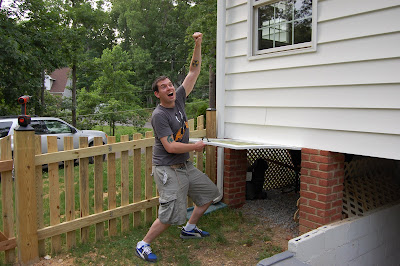
To secure the front panels, we used hinges and attached a handle, allowing us to lift the panels and access our storage space. I gave the hinges and their screws a quick once over with some white spray paint to help them blend in with the siding and frames.
 |
| Our new panels and the creepy dungeon hole. |
 |
| John displaying the liftable panels and rejoicing in our success. |
Finally, John painted the last vinyl lattice panel we decided to keep on the left-side and hung the frame directly over it. We still need to paint the screw heads to help them blend in, but it looks a lot better than it did to begin with. Don't our Manhattan euonymus look cute in front of it?
And that was that! All together, it was really easy and was a pretty inexpensive improvement. It took longer than we expected due to rain delays, the boards being unexpectedly damp, and trying to beat the dark (and mosquitoes) after work.
Now for a gratuitous cute pet photo. Look at this adorable little face peering through the fence.


No comments:
Post a Comment